Tata Harrier
Pure+ AT
Read this variant's specsThe tyre's small contact patch is the car's handshake with the road. Everything above it has to work through that patch.
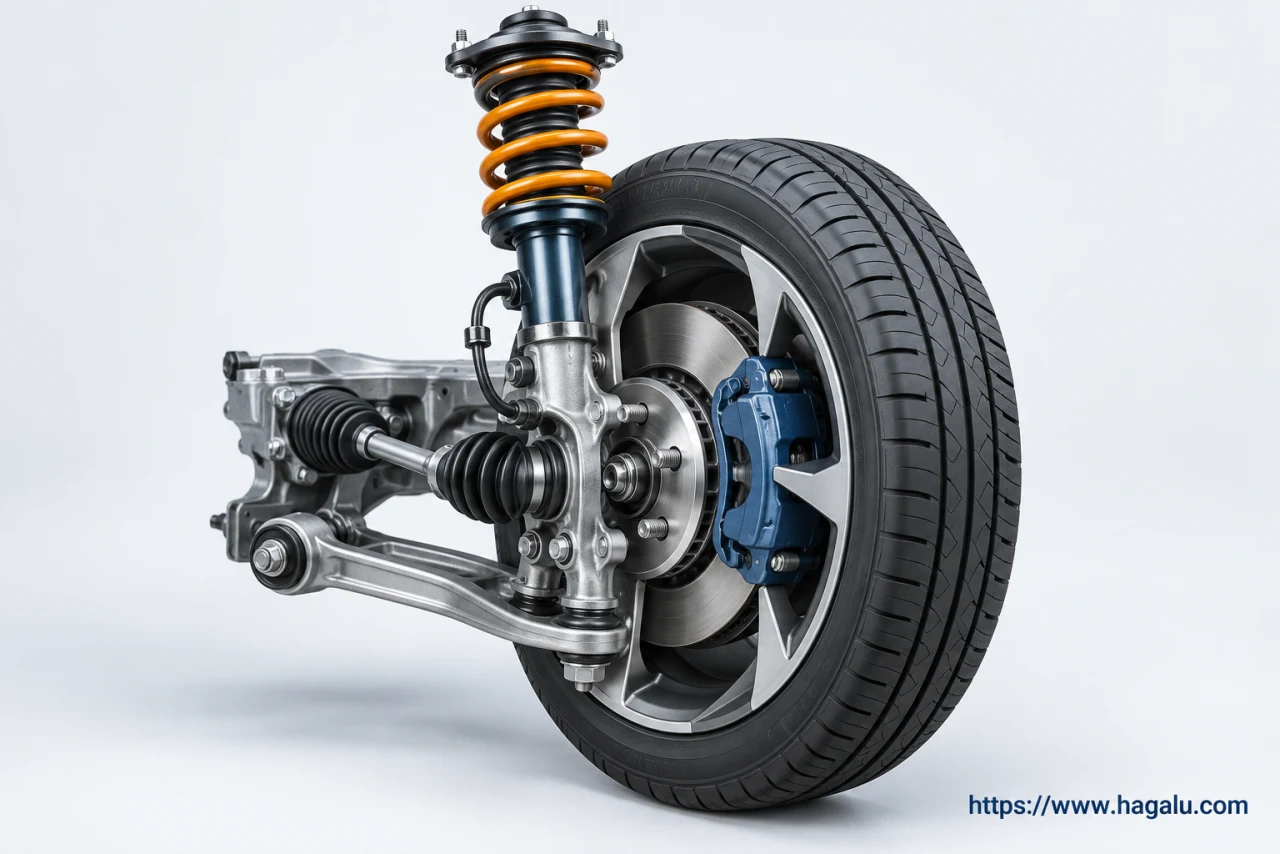
Start hereThe tyre touches the road; the wheel, brake and suspension connect that contact to the body.
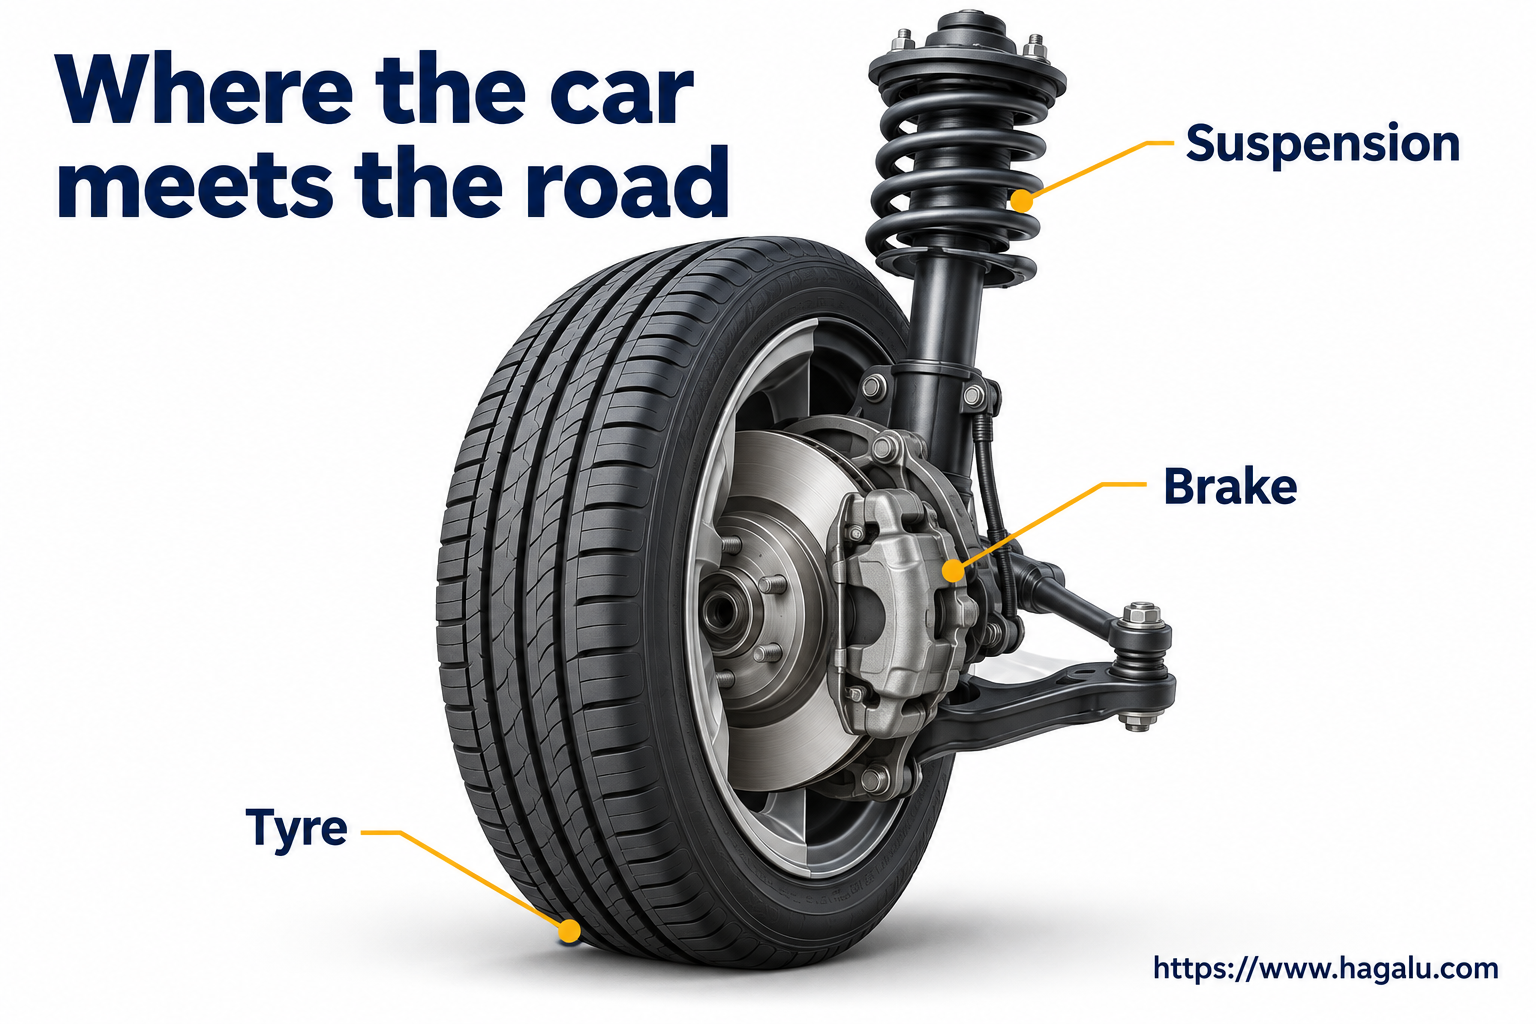
The tyre supports load through its pressurised structure and develops longitudinal and lateral forces. The wheel supports the tyre; the hub and bearing allow rotation. Braking and suspension forces pass through the mounting geometry to the body or frame.
Tyre construction, compound, tread, temperature, pressure and load affect behaviour. A visual pattern or wheel diameter cannot prove grip. An approved size must also fit clearance, load, speed, offset and compatibility requirements.
Start hereThe three size numbers mix millimetres, a percentage and inches.
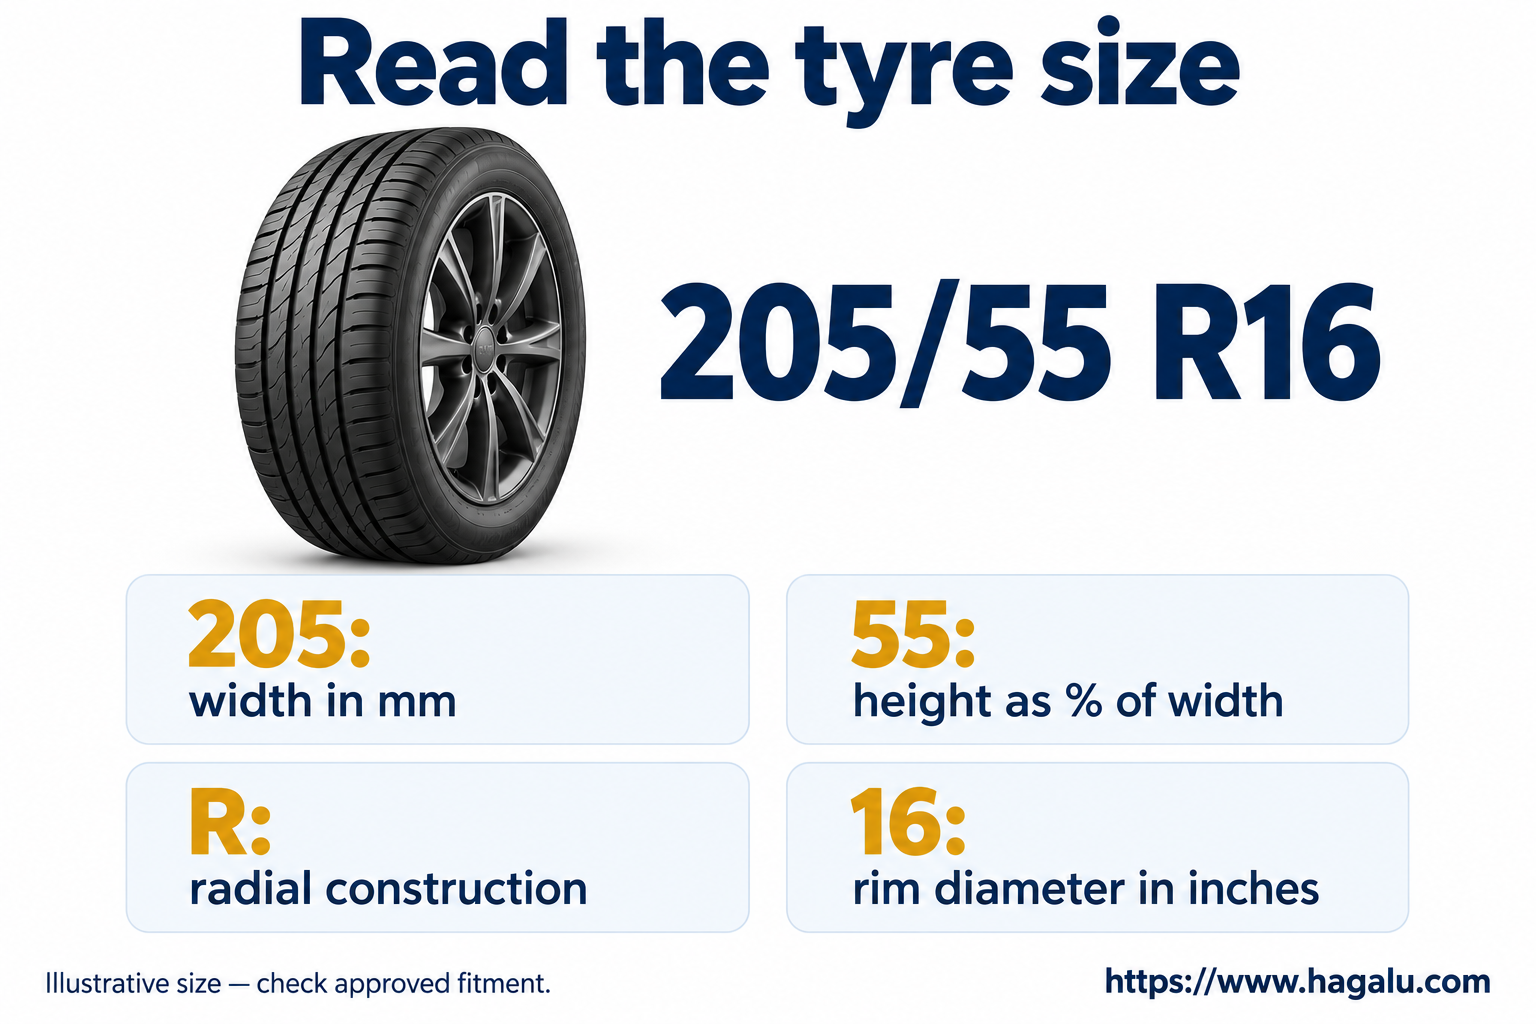
In the illustrative marking 205/55 R16, 205 is nominal section width in mm, 55 is sidewall height as a percentage of that width, R means radial construction, and 16 is wheel-rim diameter in inches. Approximate nominal sidewall height is 205 × 0.55 = 112.75 mm; actual dimensions and rolling radius depend on the tyre and operating state.
The following load index and speed symbol are separate ratings. Do not treat a speed rating as permission to drive that fast. Use the vehicle's approved fitment and manufacturer instructions; an online diameter match alone does not approve a replacement.
Start hereUse the car's specified pressure for its load—not the maximum number moulded on the tyre.
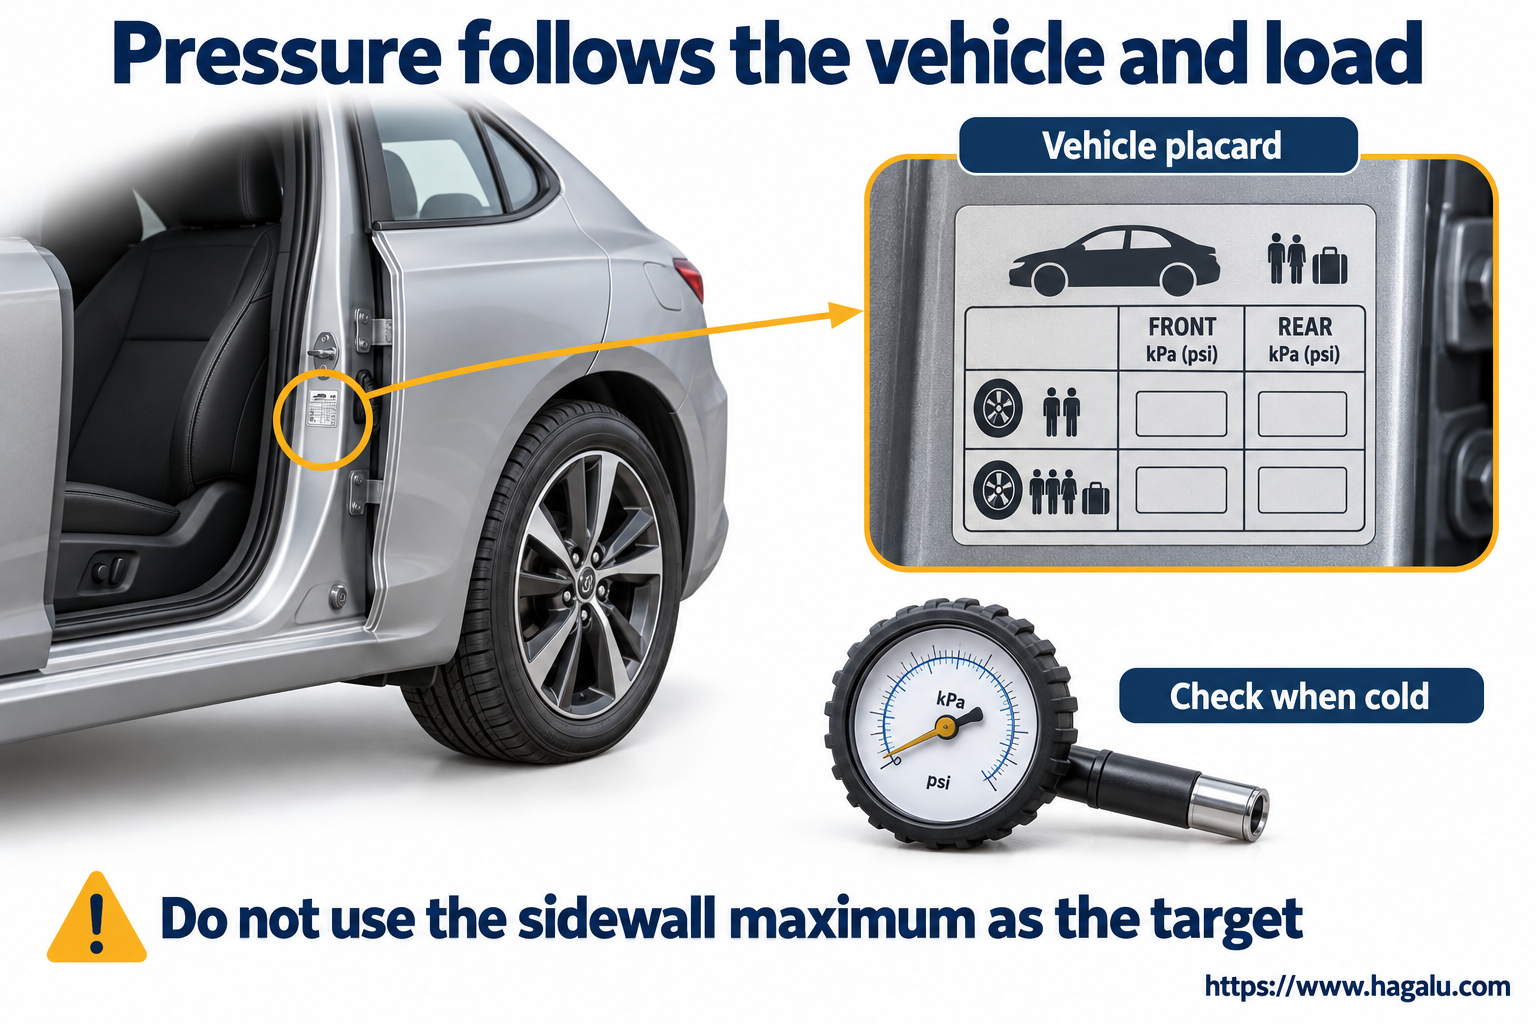
Recommended cold inflation pressure comes from the vehicle placard and manual, including any load-dependent setting. Pressure changes with temperature, so the measurement condition matters. A tyre sidewall's maximum rating is not a universal everyday target.
Too little pressure can increase flexing, heat and uneven wear. Excess pressure relative to the specification can also change handling and ride. TPMS is a warning system, not a substitute for appropriate checks. Load index, axle limits and pressure must remain compatible with the intended use.
Start hereA disc is squeezed by pads; a drum is pressed from inside by shoes.
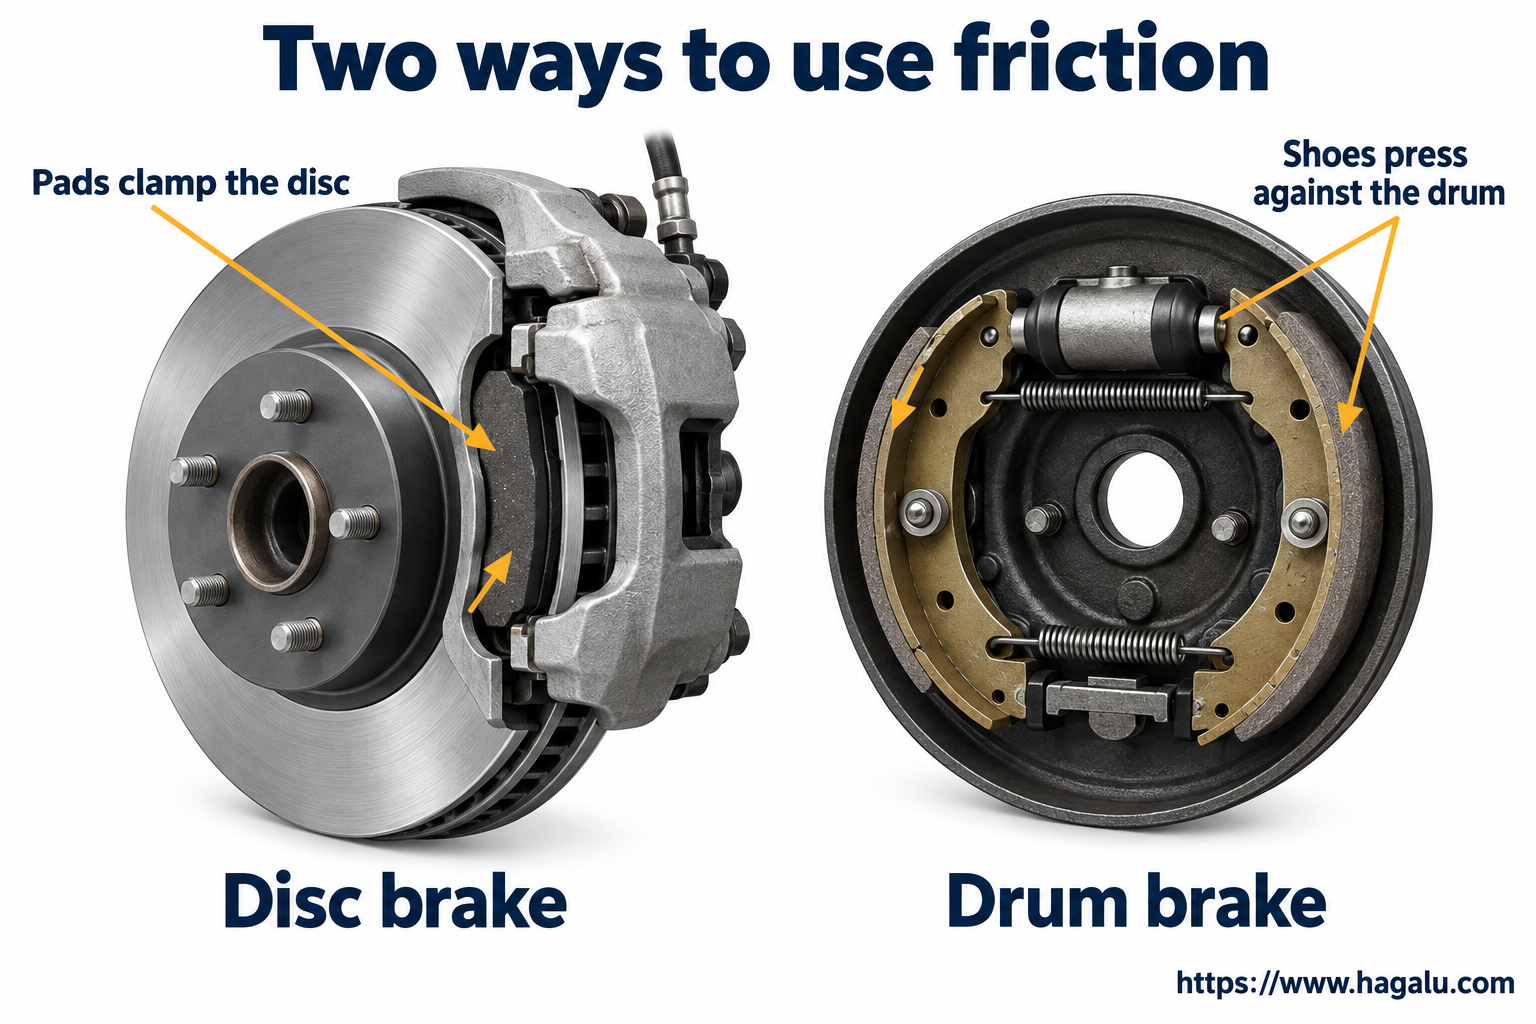
A disc brake's caliper applies pads to a rotating disc. A drum brake uses shoes against the inside of a drum. Heat management, dimensions, materials, hydraulic control and the whole vehicle's requirements determine performance; rear drums are not automatically unsafe because front discs look more impressive.
Repeated braking creates heat and can change friction or fluid behaviour. Pad or disc size alone does not establish stopping distance. Tyre grip, road surface, vehicle mass, speed and control systems matter. ABS manages wheel slip; it cannot abolish the limits of traction.
| Part | Basic role | Not a shortcut for |
|---|---|---|
| Tyre | Road contact and force generation | Guaranteed wet grip from appearance |
| Brake | Controlled reduction of wheel/vehicle motion | Stopping distance from disc diameter alone |
| Spring | Supports load and stores elastic energy | Controlling all oscillation |
| Damper | Dissipates motion energy | Carrying all vehicle weight |
Start hereA spring can bounce. A damper helps stop the bouncing from continuing.
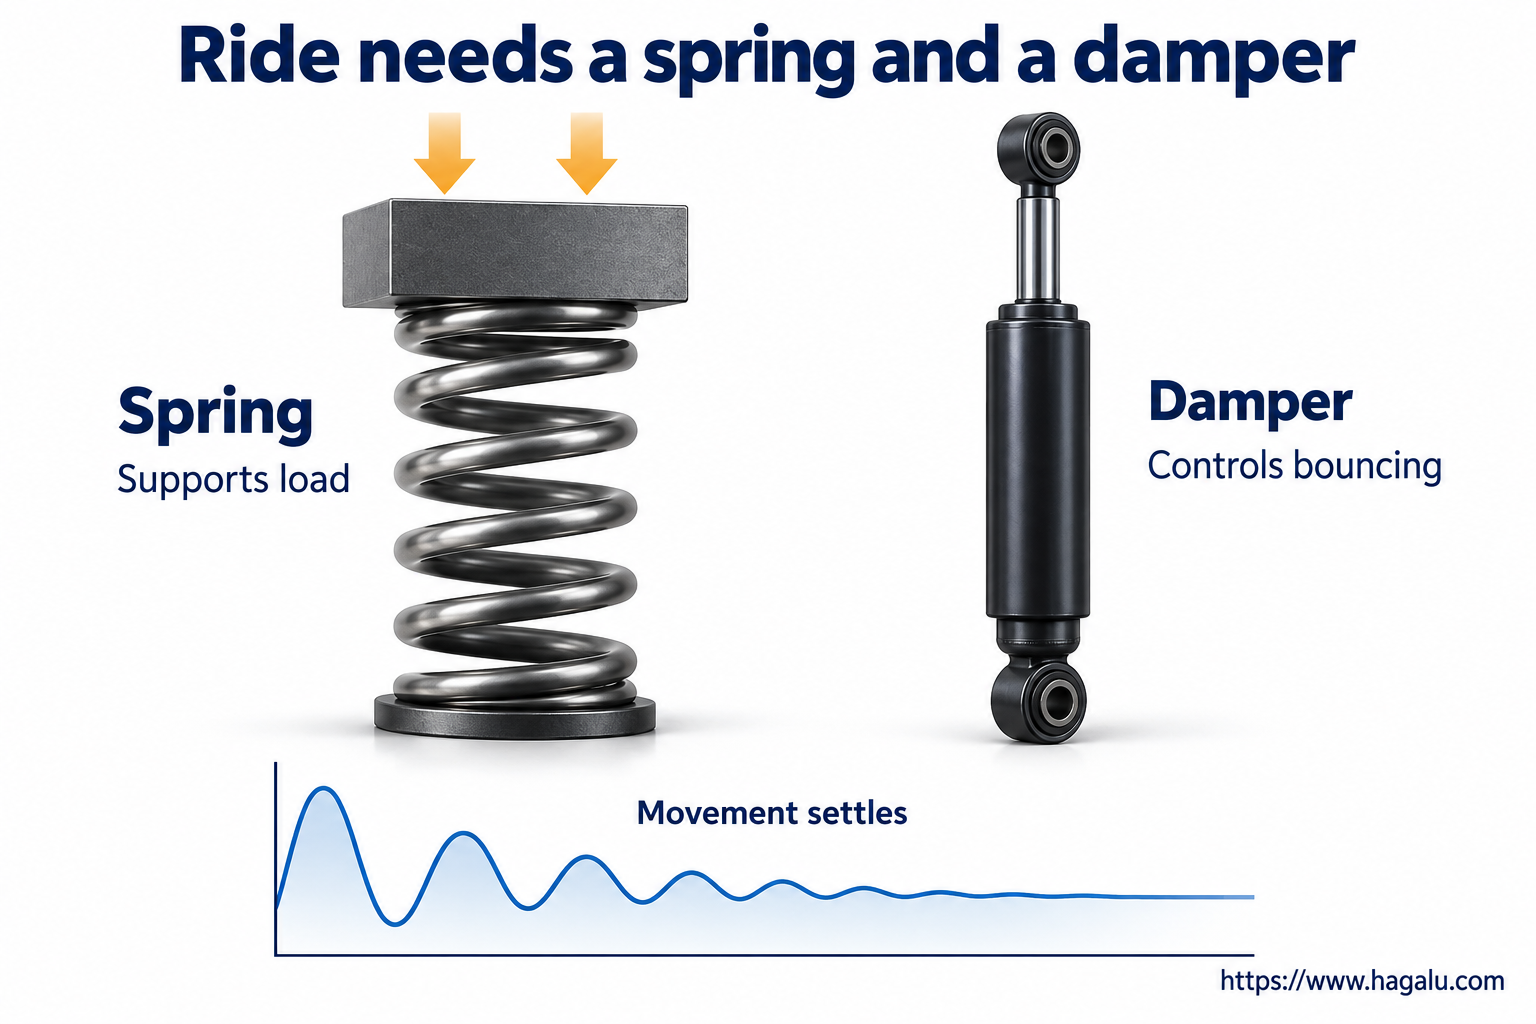
A spring stores elastic energy and its force–deflection relationship affects ride height and load response. A damper dissipates motion energy, commonly through controlled fluid flow. Real spring rates, motion ratios and damper characteristics are more involved than a single 'hard' or 'soft' label.
Struts combine structural and suspension functions; other layouts separate the spring and damper. Adaptive damping is not the same as air suspension or automatic ride-height control. A diagnosis needs the exact architecture and safe manufacturer procedure—not a universal bounce test or an improvised spring removal.
Start hereA wheel can lean, point slightly inward or outward, and steer around an inclined axis.
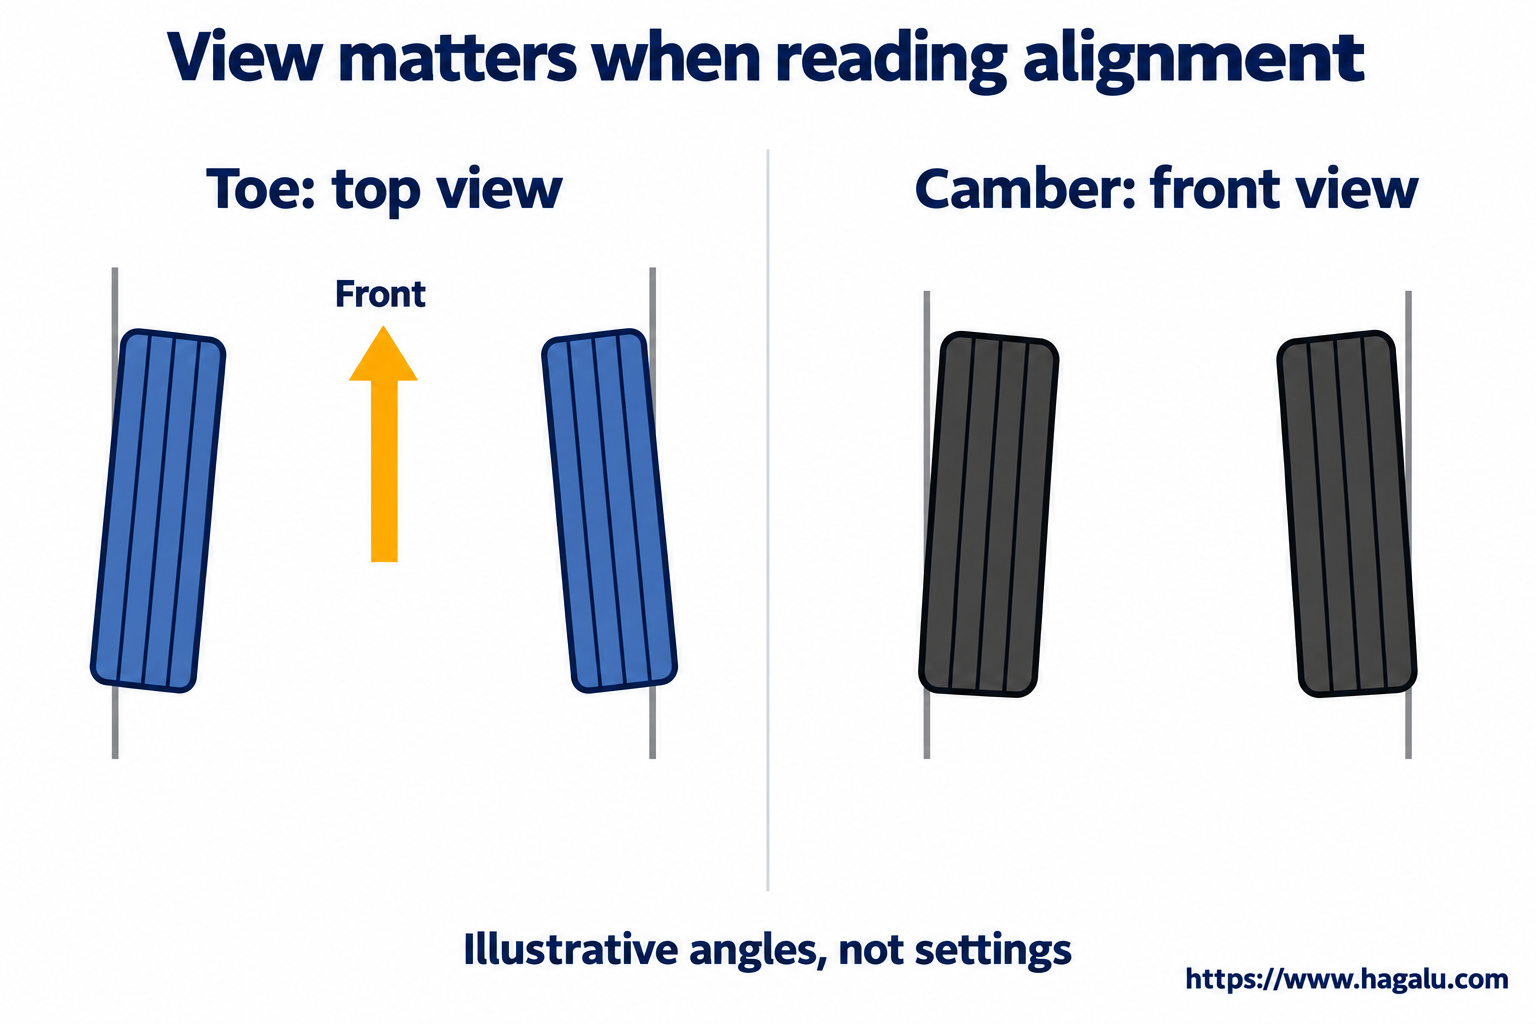
Camber is wheel inclination viewed from the front; toe concerns wheel direction viewed from above; caster concerns steering-axis inclination viewed from the side. Each uses a defined reference plane. Incorrect diagrams often mix those views, so keep them separate.
Wear and pulling can have several causes: pressure, tyre condition, geometry, bushings, loading, brake drag and road camber. Use the prescribed alignment targets and vehicle condition. A steering wheel that looks centred does not prove all four wheels are aligned.
This is educational context, not an OEM service procedure. Use current instructions for the exact vehicle and market before measurements, repairs or safety-critical work.
These links rotate within your selected country. Open an exact variant to check its recorded specifications; the teaching diagrams above do not represent these models.
Pure+ AT
Read this variant's specs1.5 M/T
Read this variant's specs06 E1
Read this variant's specs1.5 Hybrid e:HEV
Read this variant's specsIt is the nominal sidewall height expressed as 55% of the tyre's nominal section width, not 55 mm.
No. Fitment, tyre sidewall, mass, clearance, cost and the vehicle's tuning all matter.
Use the vehicle's recommended cold pressure for its loading condition. The sidewall maximum is not the normal target for every car.
No. Springs support load and store energy; dampers control motion by dissipating energy. Some assemblies contain both.
Not on its own. Pressure, load, tyre construction, worn components and operating history can also contribute.
These references support the principles, not the specifications of every car. Regional manuals and test protocols have their own scope; never transfer one vehicle's limits or legal rules to another.
All numerical examples in this guide are labelled illustrations. Technical images simplify the mechanism; they are original Hagalu teaching artwork, not manufacturer-approved parts drawings.