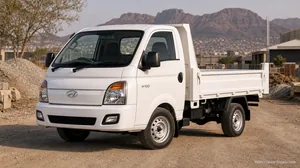
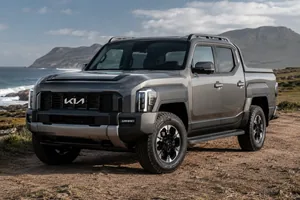
A proper head-to-head in South Africa — we cover price, performance,
petrol economy, safety and what it'll actually cost you to own each one long term.
H-100 Tipper starts ZAR 248,495 cheaperH-100 Tipper from ZAR 431,500 · Tasman from ZAR 679,995
Key Specs Side by Side
The specs that matter most — highlighted where one car leads.
Spec
H-100 Tipper
Tasman
Maximum Power
58 kW
154 kW @ 3800 rpm
Maximum Torque
167 Nm
440 Nm @ 1750-2750 rpm
Engine Size
2607 cc
2151 cc
Combined Fuel Economy
10.2 km/l
12.8 km/l
Ground Clearance
185 mm
252 mm
Boot / Load Bay
-
1173 l
Airbags
Airbags not listed in official Hyundai H100 safety specification
6
Kerb Weight
1740 kg
2317 kg
Seating Capacity
3 seats
5 seats
Warranty
5
5 Years / Unlimited km
= leads in this spec
The Bottom Line
Tasman holds a noticeable catalogue-index lead over H-100 Tipper.
Where They Actually Differ
Performance
Tasman
+38 pts
Efficiency
Tasman
+5 pts
Safety
Equal
Practicality
Tasman
+35 pts
Ownership
Tasman
+10 pts
What Each Car Gets Right (and Wrong)
H-100 Tipper
Strengths
Nothing stands out clearly here.
Weak Spots
Less powerful engine setup
Lower fuel efficiency
Lower published practicality figures
Lower published ownership cover
Best suited to:General Use
Catalogue-index leader
Tasman
Strengths
More powerful engine output
Better fuel efficiency
Stronger published practicality figures
Stronger published ownership cover
Weak Spots
No obvious weak spots to flag.
Best suited to:Published PerformancePublished EfficiencyPublished Practicality
Which One's Right for You?
H-100 Tipper
Buyers who prefer this derivative's confirmed specification mix
Tasman
Buyers prioritising the stronger published powertrain figures
Buyers prioritising the lower published fuel or energy use
Buyers prioritising the stronger published space and capacity figures
Buyers prioritising the stronger published warranty or service cover
Full Specs, Side by Side
Spec
H-100 Tipper
Tasman
Model Introduced Year
Current local generation year not confirmed
2026
Generation
Current South African H-100 Tipper listing; generation notes should be kept tied to the local model year and confirmed derivative data.
First-generation Kia Tasman; South African retail launch April 2026
Facelift History
Model-year updates can affect trim, wheels, screens, safety equipment and colours. Use the latest South African price list when checking a specific vehicle.
First generation; no facelift
Facelift Launched Since
Original current-generation version
2026
Facelift Version Ending
Current
Current
Body Style
Single-cab tipper
Pickup
Body Type Cab
Pickup
Single/extended/double cab as per derivative name
Color Note
Colour availability changes by model year, production batch and dealer stock, check the current colour selector before ordering.
Clear White, Aurora Black Pearl, Steel Grey, Gravity Blue, Tasman Orange, X-Pro Matte Green
Dealer Stock Note
Mid grade in the South Africa lineup
Flagship grade in the South Africa lineup
Model Year
2026
2026
Production Status
published
active
Segment
Pickup
Pickup
Tare Mass Kg
1740 kg
2085 kg
Vehicle Type
Pickup
Pickup
Drivetrain Note
-
Drive layout derived from the official derivative naming: 2.2D X-Pro 4x4 Double Cab Colour Coded
Spec
H-100 Tipper
Tasman
Length
4850 mm
5410 mm
Width
1740 mm
1930 mm
Height
2120 mm
1960 mm
Wheelbase
2640 mm
3270 mm
Ground Clearance (Default)
185 mm
252 mm
Fuel Tank Capacity
65 l
80 l
Kerb Weight
1740 kg
2317 kg
Gross Vehicle Weight (GVW)
3015 kg
3250 kg
Payload Capacity
1275 kg
1008 kg
Towing Capacity
1200 kg
3500 kg
Seating Capacity
3 seats
5 seats
Doors
2 doors
4 doors
Ground Clearance (With Full Seating Load)
-
230 mm
Boot/Cargo Space
-
1173 l
Number of Rows
-
2 rows
Minimum Turning Radius
-
6.25 m
Front Headroom
-
1044 mm
Rear Headroom
-
1004 mm
Front Legroom
-
1052 mm
Rear Legroom
-
940 mm
Spec
H-100 Tipper
Tasman
Front Track Width
Not Applicable
1636 mm
Rear Track Width
Not Applicable
1624 mm
Front Suspension
Not Available
Double Wishbone
Rear Suspension
Not Available
Rigid Axle (Leaf Spring)
MagneRide Damping
Not Available
Not Available
Chassis Type
-
Body-on-Frame
Power Steering
-
Yes
Steering Column
-
Adjustable
Front Spring Type
-
Coil Spring
Rear Spring Type
-
Leaf Spring
Front Anti-Roll Bar
-
Yes
Rear Anti-Roll Bar
-
No
Shock Absorber Type
-
Telescopic
Chassis Material
-
Body-on-Frame
Front Suspension Type
Not Available
Double Wishbone
Rear Axle Type
-
Rigid Axle (Leaf Spring)
Rear Suspension Type
Not Available
Rigid Axle (Leaf Spring)
Shock Absorbers
-
Telescopic
Suspension
-
Double Wishbone
Spec
H-100 Tipper
Tasman
Load Bed Length
Not Applicable
1512 mm
Load Bed Width
Not Applicable
1572 mm
Climate Control
Manual air conditioning
Yes
Power Windows
Not Available
Yes
Keyless Entry
Not Available
Yes
Push Button Start
Not Available
Yes
Wireless Charging
Wireless
Yes
Sunroof
Not Available
No
Electric Tailgate
Not Available
No
Rain Sensing Wipers
Not Available
Yes
Boot Space Seats Folded
Not Applicable
1173 l
AC Type
Manual air conditioning
Yes
Adaptive Dampers
Not Available
No
Climate Zones
Manual air conditioning
2
Engine Warranty
4
5 Years / Unlimited km
Fuel Consumption Combined
9.8
7.8
Hill Start Assist
Standard
Yes
Performance Data Logger
Not Available
No
Rev Matching
Not Available
No
Air Conditioning
Manual air conditioning
Yes
Battery Preconditioning
Not Available
Not Available
Bed Extender
Not Available
-
Canopy Fitment
Not Available
-
Diff Lock
Not Available
Yes
Difflock
Not Available
Yes
Front Diff Lock
Not Available
-
Intelligent Battery System
Not Available
Not Available
Load Bed Cover
Not Available
-
Load Bed Light
Not Available
-
Load Bed Steps
Not Available
-
Loadbox Depth Mm
Not Available
-
Loadbox Length Mm
Not Applicable
1512 mm
Loadbox Rope Hooks
Not Available
-
Loadbox Tiedown Brackets
Not Available
-
Loadbox Width Mm
Not Applicable
1572 mm
Manual Aircon
Manual air conditioning
Yes
One Pedal Driving
Not Available
Not Available
Rear Diff Lock
Not Available
-
Rear Electric Motor
Not Available
Not Available
Regenerative Braking Levels
Not Available
Not Available
Source Model Column
h-100-tipper
tasman
Sport Plus Mode
Not Available
Not Available
Sports Bar
Not Available
-
Tailgate Damper
Not Available
-
Tailgate Lock
Not Available
-
Tow Bar Type
Not Available
-
Trim Level
mid
flagship
Variant Role
Commercial utility derivative
Flagship / premium derivative
Vehicle To Grid
Not Available
Not Available
Vehicle To Load
Not Available
Not Available
Automatic Headlamps
-
Yes
Auto Dimming Mirror
-
Yes
Boot Space Seats Folded
Not Applicable
1173 l
Rear Window Defroster
-
Yes
Electric Mirror Folding
-
Yes
Driver Seat Height Adjustment
-
Yes
Follow Me Home Headlamps
-
No
12V Accessory Socket
-
Yes
Speed Limiter
-
Yes
Aero Kit
-
No
Auto Dimming Irvm
-
Yes
Boot Opener
-
Remote
Chrome Exterior Highlights
-
No
Chrome Grille
-
No
Door Ajar Warning
-
Yes
Drag Coefficient
-
0.43
Driver Display
-
Digital Cluster
Electric Folding Mirrors
-
Yes
Engine Check Warning
-
Yes
Engine Start Button Illumination
-
Yes
Engine Start Stop
Not Available
Yes
Engine Start Stop Button
Not Available
Yes
Front Armrest
-
Centre Armrest
Front Power Outlet
-
Yes
Fuel Lid Opener
-
Remote
Glovebox Cooling
-
No
Headlamp Height Adjust
-
Yes
Headlamp Washer
-
No
Headrest Adjustable
-
Yes
Heads Up Display
-
No
Impact Sensing Door Unlock
-
Yes
Intercooler
-
Yes
Multi Function Steering
-
Yes
Panoramic Roof
Not Available
No
Power Mirrors
-
Yes
Push Button Start
Not Available
Yes
Rear Defogger
-
Yes
Rear Reading Lamps
-
Yes
Rear Seat Split
-
No
Rear Wing
-
No
Remote Engine Start
-
No
Ride Mode Selection
-
Yes
Roof Antenna
-
Yes
Seat Type
-
Leather Seats
Seatbelt Pre Tensioner
-
Yes
Service Reminder
-
Yes
Side Steps
-
No
Skid Plates
-
Yes
Spare Wheel
Not Available
Full-Size Spare
Speed Alert System
-
Yes
Stabilizer Bar
-
Yes
Steering Mounted Controls
-
Yes
Steering Response
-
Normal
Tachometer
-
Yes
Tail Lamps
-
Yes
Telescopic Steering
-
Tilt and Telescopic
Tilt Steering
-
Tilt and Telescopic
Trip Computer
-
Yes
Tyre Repair Kit
-
No
Vanity Mirror
-
Yes
Voice Command
-
Yes
Voice Command Support
-
Yes
Accelerator 0 100
-
9.8 sec
Automatic High Beam
-
No
Bottle Holders
-
4
Centre Console
-
Centre Armrest
Common Rail Injection
-
Common Rail Direct Injection
Digital Speedometer
-
Yes
Electric Fold Indicator Mirrors
-
Yes
Front Wiper
-
No
Front Wipers Type
-
No
Glove Box
-
Yes
Heated Mirrors
-
Yes
Intelligent Keyless Entry
-
Yes
Lift Gate
-
No
Mirror
-
Electric
Passive Entry Start
-
Yes
Power Sliding Doors
-
No
Power Socket 12v
-
Yes
Powered Tailgate
-
No
Reading Lights Rear
-
Yes
Rear Air Conditioning
-
No
Rear LED Combination Taillights
-
Yes
Rearview Mirror Inside
-
Yes
Remote Central Locking
-
Yes
Remote Side Mirror
-
Yes
Remote Start
-
No
Rim Size
Not Available
265/70 R17
Roof Load
-
200 kg
Roof Rack Compatibility
-
No
Side Impact Bars
-
Yes
Sonar
-
Yes
Sound System
Not Available
8
Stabilizer Bar Front
-
Yes
Stabilizer Bar Rear
-
No
Steering Column Adjustment
-
Tilt and Telescopic
Sub Frame
-
Body-on-Frame
Surround View Monitor
Not Available
No
TPMS
Not Available
Yes
Unlocking
Not Available
Yes
Vanity Mirror Illuminated
-
Yes
Vdc
-
Yes
Walk Away Auto Door Lock
-
Yes
Walk Away Lock
-
Yes
Wireless Charger
Wireless
Yes
Spec
H-100 Tipper
Tasman
Engine
2.6-litre diesel
2.2-litre Turbocharged Diesel
Engine Code
Not Officially Disclosed
D4HE
Fuel Type
Diesel
Diesel
Hybrid System
Not Applicable
Not Applicable
Engine Displacement
2607 cc
2151 cc
Cylinders
Not Officially Disclosed
4
Cylinder Layout
Not Officially Disclosed
Inline
Valves
Not Officially Disclosed
16
Valves per Cylinder
Not Officially Disclosed
4
Aspiration
Not Officially Disclosed
Turbocharged
Fuel System
Not Officially Disclosed
Common Rail Direct Injection
Compression Ratio
Not Officially Disclosed
16.0:1
Bore
Not Officially Disclosed
83 mm
Stroke
Not Officially Disclosed
99.4 mm
Maximum Power
58 kW
154 kW @ 3800 rpm
Maximum Torque
167 Nm
440 Nm @ 1750-2750 rpm
Combined Power
Not Applicable
Not Applicable
Combined Torque
Not Applicable
Not Applicable
Motor Type
Not Applicable
Not Applicable
Number of Motors
Not Applicable
Not Applicable
Motor Location
Not Applicable
Not Applicable
Drive Type
RWD
4WD
Transmission
Not Officially Disclosed
8-Speed Automatic
Top Speed
Not Officially Disclosed
185 km/h
0-100 km/h
Not Officially Disclosed
10.4 sec
Quarter Mile
Not Officially Disclosed
17.7 sec
Drive Modes
Not Officially Disclosed
Eco, Normal, Sport, My Drive
Launch Control
Not Officially Disclosed
No
Rev Limiter
Not Officially Disclosed
4500 rpm
Power-to-Weight Ratio
33.3 kW/tonne
66.5 kW/tonne
Torque-to-Weight Ratio
96 Nm/tonne
189.9 Nm/tonne
Battery Capacity
Not Applicable
Not Applicable
Usable Battery Capacity
Not Applicable
Not Applicable
Battery Type
Not Applicable
Not Applicable
Battery Voltage
Not Applicable
Not Applicable
Electric Range
Not Applicable
Not Applicable
AC Charging Power
Not Applicable
Not Applicable
DC Charging Power
Not Applicable
Not Applicable
AC Charging Time
Not Applicable
Not Applicable
DC Charging Time
Not Applicable
Not Applicable
Regenerative Braking
Not Applicable
Not Applicable
Spec
H-100 Tipper
Tasman
Gearbox
Manual
8-Speed Automatic
Drivetrain Layout
Rear-wheel drive
4WD
LSD Available
Not Applicable
Yes
Transfer Case
Not Applicable
Two-speed transfer case
Differential Lock
Not Applicable
Yes
Paddle Shifters
Not Applicable
No
Final Drive Ratio
Not Applicable
3.94
Number of Gears
5
8
Transmission Type
Manual
Automatic Transmission
Clutch Type
Not Applicable
Torque Converter
Gear Shift Indicator
Yes
No
Gear Shift Type
Manual
Automatic
Drivetrain
Rear-wheel drive
4WD
4WD Engagement
Not Applicable
Electronic selector
4WD Hi Range
Not Applicable
Yes
4WD Lo Range
Not Applicable
Yes
4WD Selector
Not Applicable
Yes
Automatic Shift Paddles
Not Applicable
No
Differential Type Front
Not Available
-
Differential Type Rear
Not Available
-
Front Differential Lock
Not Applicable
Not Applicable
Gearbox Type
Manual
8-Speed Automatic
Low Range Ratio
Not Applicable
2.72:1
Low Range
Not Applicable
Yes
Axle Layout
Rear-wheel drive
4WD
Rear Differential Lock
Not Applicable
Yes
Transfer Case Guard
Not Available
-
Transmission Speeds
5
8
Engine Position
-
Front Transverse
Steering Turns Lock to Lock
-
15.2:1
Spec
H-100 Tipper
Tasman
Claimed Mileage
10.2 km/l
12.8 km/l
City Mileage
8.3 km/l
10.4 km/l
Highway Mileage
11.9 km/l
15.0 km/l
Fuel Tank Capacity
65 l
80 l
Emission Standard
Not Applicable
Euro 6
AdBlue Tank Capacity
Not Applicable
No
Auto Start Stop
Not Applicable
Yes
Real-world Mileage
10.2 km/l
12.8 km/l
Charging Port Type
Not Applicable
Not Applicable
Charging Type
Not Applicable
Not Applicable
Fuel Tank Litres
65 l
80
Combined Driving Range
Not Applicable
Not Applicable
Electric Consumption
Not Applicable
Not Applicable
Range Real World Highway
Not Applicable
Not Applicable
Range Real World Mixed
Not Applicable
Not Applicable
Low Fuel Warning
-
Yes
Spec
H-100 Tipper
Tasman
Airbags
Airbags not listed in official Hyundai H100 safety specification
6
ABS
Standard
Yes
Electronic Stability Control
Not Available
Yes
Traction Control
Standard
Yes
Hill Descent Control
Not Available
Yes
Hill Start Assist
Standard
Yes
Child Safety Lock
Not Available
Yes
ISOFIX Mounts
Not Available
Yes
Brake Assist
Not Available
Yes
Tyre Pressure Monitor
Not Available
Yes
Engine Immobiliser
Not Available
Yes
Seatbelt Warning All Seats
Not Available
Yes
Front Parking Sensors
Standard
Yes
AEB
Not Available
Yes
BA
Not Available
Yes
Brake Override System
Not Available
Yes
Curtain Airbags
Not Available
Yes
Driver Airbag
Not Available
Yes
EBD
Standard
Yes
Engine Immobiliser
Not Available
Yes
Hill Hold
Standard
Yes
Passenger Airbag
Not Available
Yes
Rear Cross Traffic Alert
Not Available
Yes
Seatbelt Pretensioners
Not Available
Yes
Seatbelt Reminder
Not Available
Yes
Side Airbags
Not Available
Yes
Stability Control
Not Available
Yes
TCS
Standard
Yes
Knee Airbag
Not Available
No
ABS EBD
Standard
Yes
Alarm System
-
Yes
Central Locking
-
Yes
Side Impact Beams
-
Yes
Speed Alert System
-
Yes
Pedestrian Detection AEB
-
Yes
Safety Rating
-
5
Whiplash Protection
-
Yes
Lane Change Warning
-
Yes
Fatigue Detection
-
Yes
Blind Spot Monitoring
-
Yes
Anti Theft Alarm
-
Yes
Driver Front Passenger Airbags
-
6
Driver Passenger Airbags
-
6
ESC With Traction Control
-
Yes
Spec
H-100 Tipper
Tasman
Cruise Control
Standard
Yes
Adaptive Cruise Control
Not Available
Yes
Lane Keep Assist
Not Available
Yes
Lane Departure Warning
Not Available
Yes
Blind Spot Monitoring
Not Available
Yes
Rear Cross Traffic Alert
Not Available
Yes
Parking Sensors
Front and rear
Yes
Rear View Camera
Not Available
Yes
360 Degree Camera
Not Available
No
Autonomous Emergency Braking
Not Available
Yes
Driver Fatigue Alert
Not Available
Yes
Traffic Sign Recognition
Not Available
No
Auto Highbeam
Not Available
No
Auto Wipers
Not Available
Yes
EV Mode
Not Available
No
Rear Parking Sensors
Standard
Yes
Reverse Camera
Not Available
Yes
Adaptive Cruise Control
Not Available
Yes
Park Assist
Not Available
No
Around View Monitor
Not Available
No
Blind Spot Warning
Not Available
Yes
Forward Collision Warning
Not Available
Yes
Auto Lights
-
Yes
Eco Mode
-
Yes
Sport Mode
-
Yes
Emergency Braking
-
Yes
Front Camera
-
Yes
Parking Distance Sensors
-
Yes
Parking Sensor
-
Yes
Automatic High Beam
-
No
Pre-Collision System
-
Yes
Rain Sensor Wipers
-
Yes
Rear View Camera
-
Yes
Reverse Camera Type
-
Yes
Reversing Camera
-
Yes
Surround View Camera
Not Available
No
Spec
H-100 Tipper
Tasman
Seat Material
Cloth
Artificial Leather
Heated Seats
Not Applicable
Yes
Ventilated Seats
Not Applicable
No
Ambient Lighting
Not Applicable
Yes
Front Shoulder Room
Not Applicable
1522 mm
Rear Shoulder Room
Not Applicable
1516 mm
Steering Wheel Material
Not Applicable
Leather
Instrument Cluster Type
Digital instrument cluster
Digital
Interior Colour Options
3
Black
60 40 Split Seat
Not Applicable
No
Driver Seat Adjustment
Not Applicable
8-Way Power
Fabric Seats
Cloth
No
Passenger Seat Adjustment
Not Applicable
4-Way Manual
Interior Courtesy Lamps
Cabin trim, seating material, screen layout and driver-assistance equipment vary by derivative. Compare the chosen H-100 Tipper grade before assuming a feature is included.
12.3-inch floating touchscreen, digital cluster, wireless CarPlay/Android Auto, HUD (SX/X-Pro), off-road terrain displays (X-Pro), underbody skid plates (X-Pro), ADAS suite
Interior Colours
3
Black
Seat Trim
Cloth
Artificial Leather
Seat Adjustment
-
8-Way Power
Steering Type
-
Yes
Steering Adjustment
-
Tilt and Telescopic
Folding Rear Seats
-
No
Front Armrest
-
Centre Armrest
Rear Armrest
-
Yes
Cup Holders
-
4
Rear AC Vents
-
No
Rear USB Ports
-
Yes
Driver Lumbar Support
-
No
Door Map Pockets
-
Yes
Adjustable Driver Seat
-
8-Way Power
Adjustable Front Seat
-
4-Way Manual
Cooled Seats
-
No
Front Headrest
-
Adjustable
Leather Seats
-
Yes
Memory Seats
-
No
Rear Headrest
-
Adjustable
Armrest Front
-
Centre Armrest
Armrest Rear
-
Yes
Boot Space Seats Down
-
1173
Driver Seat
-
8-Way Power
Interior Trim Colour
-
Black
Leather Accented Seat Trim
-
Leather
Rear Seat Centre Armrest
-
Yes
Seat Adjustment Driver Backrest
-
No
Seat Belt Warning
-
Yes
Seat Fold Type
-
No
Spec
H-100 Tipper
Tasman
Infotainment System
SYNC
12.3-inch Touchscreen
Apple CarPlay
Standard
Yes
Android Auto
Standard
Yes
Bluetooth Connectivity
Standard
Yes
Number of Speakers
Not Available
8
Digital Instrument Cluster
Digital instrument cluster
Yes
USB Ports
Not Available
4
Wireless Apple CarPlay
Standard
Yes
Wireless Android Auto
Standard
Yes
Infotainment Screen Size
SYNC
12.3
Infotainment Screen
SYNC
12.3
Multi Information Display
Digital display
Digital
Connected Services
SYNC
Yes
Smartphone Connectivity
Bluetooth
Yes
Touchscreen
SYNC
12.3
Navigation System
-
Yes
FM Radio
-
Yes
Steering Wheel Audio Controls
-
Yes
Voice Recognition
-
Yes
AUX Input
-
No
Wi-Fi Hotspot
-
No
Audio Controls On Steering
-
Yes
Infotainment Display
-
12.3
Rear Usb
-
Yes
Premium Audio
-
Yes
Audio
-
Yes
Audio Speakers
Not Available
8
Audio System
-
Yes
Display Audio
-
12.3-inch Touchscreen
Front Rear USB Charge Ports
-
2
Head Up Display
-
No
Voice Control
-
Yes
Radio
-
Yes
Spec
H-100 Tipper
Tasman
LED Headlamps
Halogen
Yes
Daytime Running Lamps
Not Available
Yes
Fog Lamps
Not Available
Yes
Roof Rails
Not Available
No
Exterior Colour Options
3
Multiple
Body Type
Pickup
Double Cab Bakkie
Led Headlights
Halogen
Yes
Exterior Colour Options
3
6
Headlamps
Halogen
Yes
Headlight Type
Halogen
Yes
Headlights
Halogen
Yes
Load Bed Liner
Not Available
-
Panoramic Sunroof
Not Available
No
Active Exhaust
Not Available
Not Available
Alloy Wheel Design
-
17-inch Alloy
Chrome Exterior Finish
-
No
Body Cladding
-
Yes
Rear Spoiler
-
No
Roof Type
-
Standard
Wing Mirror Type
-
Electric
Rear Wiper
-
No
Door Handle Finish
-
Body Colour
DRL
Not Available
Yes
Fog Lights
-
Yes
Front Fog Lights
-
Yes
Led Taillights
-
Yes
Rear Fog Lights
-
No
Front Overhang
-
855 mm
Rear Overhang
-
1285 mm
Auto Headlights
-
Yes
Automatic Headlamps
-
Yes
Daytime Running Lights
Not Available
Yes
Electric Blind Sunroof
-
Standard
Exterior Door Handle Colour
-
Body Colour
Exterior Mirror Electric
-
Yes
Exterior Mirror Folding
-
Yes
Front Fog Lamps
Not Available
Yes
Headlamp Levelling
-
Yes
Rear Spoiler
-
No
Spec
H-100 Tipper
Tasman
Approach Angle
Not Available
32.2 deg
Departure Angle
Not Available
26.2 deg
Wading Depth
Not Available
800 mm
Terrain Modes
Not Available
Snow, Mud, Sand, Rock
Locking Differential
Not Applicable
Yes
4WD System Type
Not Applicable
Part-time 4WD with low range
Breakover Angle
Not Available
25.8 deg
Energy Recovery Display
Not Available
Not Available
Front Skid Plate Guard
Not Available
-
Ground Clearance Max
185 mm
252 mm
Ground Clearance Min
185 mm
252 mm
Off Road Descent Control
Not Available
Yes
Off Road Traction Assist
Not Available
-
Crawl Control
Not Available
-
Rear Skid Plate Guard
Not Available
-
Skid Plates Fuel Tank
Not Available
-
Skid Plates Transfer Case
Not Available
-
Terrain Mode Mud
Not Available
-
Terrain Mode Normal
Not Available
-
Terrain Mode Rock
Not Available
-
Terrain Mode Sand
Not Available
-
Terrain Mode Snow
Not Available
-
Terrain Response System
Not Available
-
Underbody Camera
Not Available
-
Underbody Protection
-
Yes
Ramp Breakover Angle
-
25.8 deg
Recovery Hooks
-
Yes
Hill Descent Control
Not Available
Yes
Ramp-over Angle
-
25.8 deg
Approach Angle Deg
-
32.2 deg
Departure Angle Deg
-
26.2 deg
Wading Depth Mm
-
800 mm
Spec
H-100 Tipper
Tasman
Tyre Size
Not Available
265/70 R17
Front Brake Type
Not Available
Ventilated Disc
Rear Brake Type
Not Available
Ventilated Disc
Spare Wheel Type
Not Available
Full-Size Spare
Wheel Rim Size
Not Available
265/70 R17
Fifth Wheel Prep
Not Available
-
Handbrake Type
Not Applicable
Electronic
Wheel Type
-
17-inch Alloy
Front Brake Disc Diameter
-
325 mm
Rear Brake Drum Diameter
-
325 mm
Parking Brake Type
-
Electronic
Tyre Load Index
-
116
Tyre Speed Rating
-
T
Brake Type Front
-
Ventilated Disc
Brake Type Rear
-
Ventilated Disc
Spare Tyre
Not Available
Full-Size Spare
Tyre Type
-
Radial
Front Tyre Width
-
265 mm
Rear Tyre Width
-
265 mm
Wheel Diameter
Not Available
265/70 R17
Auto Brake Hold
-
Electronic
Autonomous Emergency Brake
-
Yes
Brakes
-
Ventilated Disc
Cornering Brake Control
-
Yes
Electric Park Brake
-
Electronic
Electronic Brakeforce Distribution
-
Yes
Hydraulic Brake Assist
-
Yes
Leather Steering Wheel
-
Leather
Spare Wheel Size Type
-
Full-Size Spare
Steering Wheel Audio Controls
-
Yes
Steering Wheel Cruise Controls
-
Yes
Steering Wheel Phone Controls
-
Yes
Steering Wheel Trim
-
Leather
Tyre Pressure Display
-
Yes
Tyre Pressure Monitoring
Not Available
Yes
Wheel Material
-
17-inch Alloy
Wheel Size Type
-
265/70 R17
Wheels
-
17-inch Alloy
Spec
H-100 Tipper
Tasman
Service Interval
15000 km / 12 months
15000
Battery Warranty
4
-
Maintenance Plan
3 Years / 45000 km
6 Years / 90,000 km
Engine Oil Change Interval
15000 km / 12 months
15000
First Service At
15000
15000
Service Plan Duration
3 Years / 45000 km
6 Years / 90,000 km
Service Plan Distance
3 Years / 45000 km
6 Years / 90,000 km
Alternator
120A
Yes
Service Plan
3 Years / 45000 km
6 Years / 90,000 km
Service Intervals
15000 km / 12 months
15000
Accessory Battery Type
Lead-acid
-
Approx Service Cost
-
R4,800 per service
Engine Oil Capacity
-
7.0 l
Anti-Rust Treatment
-
Yes
Spec
H-100 Tipper
Tasman
Warranty Years
5
5 Years / Unlimited km
Warranty Kilometers
5
5 Years / Unlimited km
Roadside Assistance
5 Years
5 Years / Unlimited km
Anti-Corrosion Warranty
5 Years
5 Years
Basic Warranty
5
5 Years / Unlimited km
Roadside Assistance
5 Years
5 Years / Unlimited km
Warranty
5
5 Years / Unlimited km
Warranty Roadside Assistance
5 Years
5 Years / Unlimited km
Spec
H-100 Tipper
Tasman
CO2 Emissions
Not Applicable
206 g/km
Hybrid System Type
Not Available
Not Available
Fuel Octane Requirement
Diesel
B7 Diesel
Start Stop System
-
Yes
Noise Level
-
72 dB
Variable Valve Timing
-
No
Particulate Filter
-
DPF
Euro Emission Standard
-
Euro 6
Green NCAP Rating
-
5
Idle CO2 Output
-
206
Fuel Evaporation Control
-
No
CO2 Emissions G Km
-
206
Spec
H-100 Tipper
Tasman
Ownership Role
Mid
Flagship
Price Zar
455900 ZAR
1004999 ZAR
Pricing Role
Current listed price
Current official retail price
Starting Price
455900
1004999
Starting Price Zar
455900
1004999
Spec
H-100 Tipper
Tasman
Real-world City Mileage Min
-
8.1 l/100km
Real-world City Mileage Max
-
10.5 l/100km
Real-world Highway Mileage Min
-
12.7 l/100km
Real-world Highway Mileage Max
-
14.8 l/100km
Source-backed Catalogue Index
A transparent specification index shown only when every vehicle clears the minimum comparable-data threshold.
Weighted / 100
Catalogue-index readout
Tasman leads by 19 points
Tasman holds a noticeable catalogue-index lead over H-100 Tipper.
Moderate difference in the source-backed catalogue index.
Why this scoreView full breakdown
Catalogue-index leader
Tasman
Performance
72/100
Efficiency
51/100
Safety
94/100
Practicality
93/100
Ownership
75/100
H-100 Tipper
Performance
34/100
Efficiency
46/100
Safety
94/100
Practicality
58/100
Ownership
65/100
How to Read This Comparison
🏆KIA Tasman
leads the catalogue index with 78 pts
vs 59 pts for H-100 Tipper
In Hagalu's source-backed catalogue index, Tasman leads. However, H-100 Tipper may suit buyers prioritising different confirmed fields. Ultimately, the right choice depends on your driving priorities in South Africa.
Other Comparisons Worth Checking
See how similar cars go head-to-head — you might find a better fit than you expected.
There is no universal winner. Use the comparison table to match the exact South African derivatives on price, safety equipment, space, powertrain and ownership cover. The category indicators summarise published catalogue data; they are not a road test or customer rating.
Compare the published consumption or mileage rows for the exact derivatives using the same unit and test basis. A catalogue figure is useful for like-for-like comparison, but traffic, speed, load, weather and driving style can change actual fuel use.
Compare only equipment explicitly listed for each derivative, including airbags, stability control and driver-assistance systems. Confirm the exact trim with the manufacturer, and treat any independent crash-test result separately because equipment and ratings can differ by market.
A reliable five-year total cannot be calculated from catalogue data alone. Add the exact purchase and finance cost, fuel or electricity, insurance quotes, scheduled servicing, tyres and expected resale value. Check whether the selected derivative includes a service or maintenance plan.
Use the seating, boot or load-space, ISOFIX and safety rows as a first check. Then test the exact cars with your child seats, passengers and typical luggage, because published dimensions do not show every access or comfort difference.
Compare the published power, torque and 0–100 km/h rows when they are available for both exact derivatives. Vehicle weight, gearing and power delivery also matter, so catalogue outputs alone do not establish real-world overtaking or response.
Hagalu does not publish a guaranteed resale winner. Depreciation depends on age, mileage, condition, derivative, colour, supply and demand. Compare several current used-market listings and obtain trade-in valuations for equivalent examples before relying on a resale estimate.
Check the exact derivatives for drive type, ground clearance, tyres, approach and departure angles, wading depth and low-range gearing where officially disclosed. SUV styling or all-wheel drive alone does not prove that a vehicle is suitable for demanding off-road use.
Calculate each exact derivative using your monthly distance and a current fuel or electricity price, then add finance, insurance, scheduled service, tyres and licence costs. Hagalu does not claim a fixed monthly saving without those buyer-specific inputs.
It is worth more only when the exact price difference buys equipment, space, performance or ownership cover that matters to you. Compare like-for-like lifecycle states and derivatives; a current offer and a historical last-listed price are not directly equivalent.
In Depth — Breaking It All Down
This H-100 Tipper and Tasman comparison uses the exact South African derivatives selected above. The catalogue index covers performance, efficiency, safety equipment, practicality and ownership cover only where comparable source-backed fields are present.
Performance index: H-100 Tipper 34 vs Tasman 72.
Efficiency index: H-100 Tipper 46 vs Tasman 51.
Safety-equipment index: H-100 Tipper 94 vs Tasman 94.
Practicality index: H-100 Tipper 58 vs Tasman 93.
Ownership-cover index: H-100 Tipper 65 vs Tasman 75.
These figures are Hagalu catalogue-comparison indicators, not customer ratings, crash-test scores, resale guarantees or a substitute for a road test. Each page shows its weighted source coverage beside the result.
Compare
Get Best Price
We'll Contact You
Fill in your details and a dedicated executive will reach out shortly.
✓
We've Got Your Details!
An executive will contact you shortly. Thank you for your interest.